As the school year and our time together winds down, we reflect on the challenges we’ve faced in our play and the new skills we’ve learned this year. From ratchet-straps and exploring new heights, to sportsmanship and peer cooperation, and all the way to developing leadership skills as we learned new card games such as Cheat and President- we’ve had the opportunities to learn so much this year and hone various skills whilst doing so. One last experience we engaged in to learn new skills, as our program year came to an end, was woodworking.
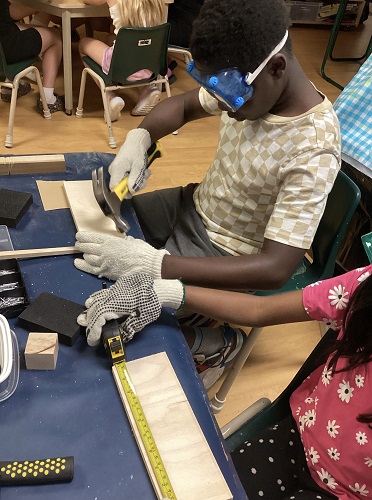
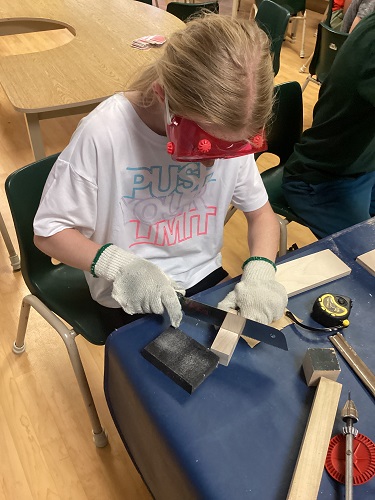
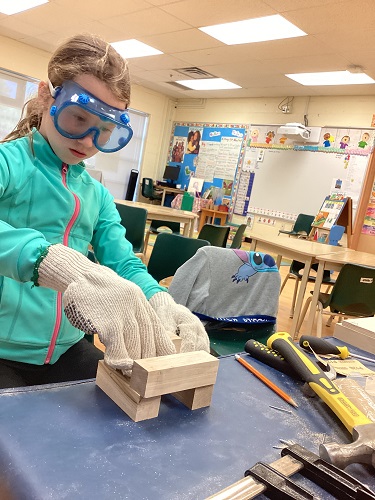
Educator Vanessa had obtained 3 boxes of various wood pieces, in different sizes, shapes, and textures. She brought in many tools, such as hammers, screw drivers, a small handheld drill, and a child-sized saw. Other accessories to accompany this project were nails and screws, sandpaper and sanding blocks, and safety goggles and gloves. The first step is always safety first, so the children were asked to don their safety goggles and gloves, and start by sanding the wood pieces they chose to use since the texture was rough and slightly splintered. Some pieces were already fairly smooth while others needed a little extra work to get right. We discovered how much saw dust this can produce as our clothes, and the table cloth, got covered in the wooden dust.
Next the children were offered the opportunity to explore the various tools we had and choose what they were going to make. Each child and a slightly different opinion and idea on what they wanted their end product to be- Leila made a shelf, Ariana H made a sled, Liam made a box, Aaron made a boat, Charlie made “little bits”, Brielle a couch, and Avery attached a bunch of pieces together. But before we could get to our end projects, there was a lot of trial and error as we explored the nails and hammer, screws and screw drivers, and, of course, the saw and drill.
Since the wooden pieces differed in size we had to measure and cut them to suit our needs. Pencils were added so we could mark the wood, and we used a guide to hold the wood in place while we sawed- the guide was referred to as “the train” since the children thought it looked sort of like one. We had a clamp which we also tried to use to hold the wood pieces together for a more accurate measurement but found it difficult as the wood pieces were slightly small and didn’t stay clamped together very well, causing the wood to shift while we sawed.
Another method of trial and error was trying to make holes in the wood for nails and screws. Unfortunately, the drill bit that we had on our handheld drill was small and couldn’t make deep holes- we learned that we had to make two shallow holes on either side of the wood to help guide our nail or screw in and make its way all the way through the wood without splitting it- splitting wood happens when we force an object through a piece of wood when it isn’t durable enough to make it through on its own, causing the force to split the wood.
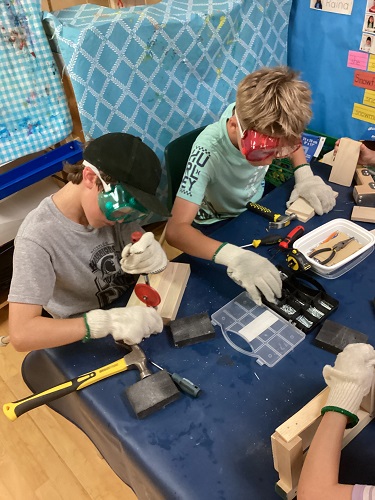
The saw was our favourite tool and the most popular one to use- we only had one so we were forced to use patience, turn taking, and time management skills in order to ensure it was shared fairly. We asked each child to cut one thing at a time so that the saw wasn’t being used by one person the whole time. We also used a wooden plank as a platform to save the table and other items from being cut whilst cutting our wood. The saw produced the most amount of saw dust, and we had to pause our actions many times to ensure we cleared the path for the saw to glide through. At first, we struggled, especially those with large and thick pieces of wood as it took a lot of more upper body strength and momentum to get the saw all the way through, but eventually we all managed to cut the pieces of wood into the length and sizes we desired.
Connecting the pieces took time as well, as many nails would bend during our efforts. We learned that hitting it too hard caused the nail to bend, as well as not having a path for the nail to go through- this is when we started using the drill bit to help create a hole and path, assisting in the process of getting the nail in the wood. Liam also used a screw, forcing it into the wood to make a path, then removing it and hammering the nail in instead- this was a creative and innovative way to problem solve when the drill was being used but he needed to make a hole. We also learned that we had to be selective of the nails we used when making pre-holes, because if the hole was too bit that nail wouldn’t stay securely in place; finding nails with a larger head helped solve this problem.
All of the children appeared to enjoy the opportunity to explore these real-life tools. Using real tools is an aspect of Risky Play as we introduce these elements to the children and provide them with autonomy and opportunities to use them. We fostered social skills through problem-solving, turn taking and sharing, as well as communication as we asked our peer “can I use it when you’re done”. Dexterity was strengthened through the use of our hands, while we also strengthened our upper body and large muscles as we hammered, pushed screws in, and worked the saw. Best of all, the children were able to use their creative skills to design and build something tangible that they could keep and bring home- a 3D memento of their time in school-age 3.


